
Welcome to part 9 of a multiple part course on passing your AWS Architect, Developer & Sysops Associate exams. The best part…this course is totally free of charge!
If you haven’t already checked out my Introduction post on VPC then you should definitely check that out to get a well rounded view of what Virtual Private Cloud is.
This post is a little different to the previous ones in the series. There is no theory, this will be purely practical exercise. So I highly recommend you log onto AWS and follow the steps as we go along.
In this tutorial you will set up a VPC from scratch. We’ll use 2 methods to achieve this. The first will be via a VPC setup wizard and then afterwards we’ll set one up manually.
The tutorial will take just 15 minutes to complete and after doing so you’ll know all you need to set up a VPC from scratch. It’s massively important to know this process off by heart as it will appear in all of the associate exams.
Who should read this?
If you are studying for the:
- AWS Associate Architect
- AWS Associate Developer
- AWS Associate SysOps
Or you are using AWS and want to learn more about VPC then this is the article for you.
Ok let’s get started with the easy route first…
Create a VPC via the Wizard
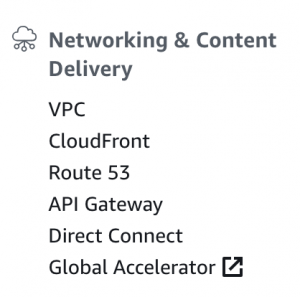
First things first, we need to load up the VPC management console.
It is located in the Networking & Content Delivery section (no surprises there).
You’ll be presented with the VPC dashboard which has a bunch of cool features that I wish AWS would include in other services. One I like most is the ability to view VPC’s across regions.
Tip: If you already have a bunch of VPCs defined in your current region, then I suggest switching regions to make it a little clearer when we review what components have been created.
Hit the Launch VPC Wizard button and proceed to the next step:

Here you can see that we get 4 pre configured VPC types. I’ll go into detail in setting up the first 2 and explain the last 2 as the process is very similar to the first with the addition of hardware VPN access.
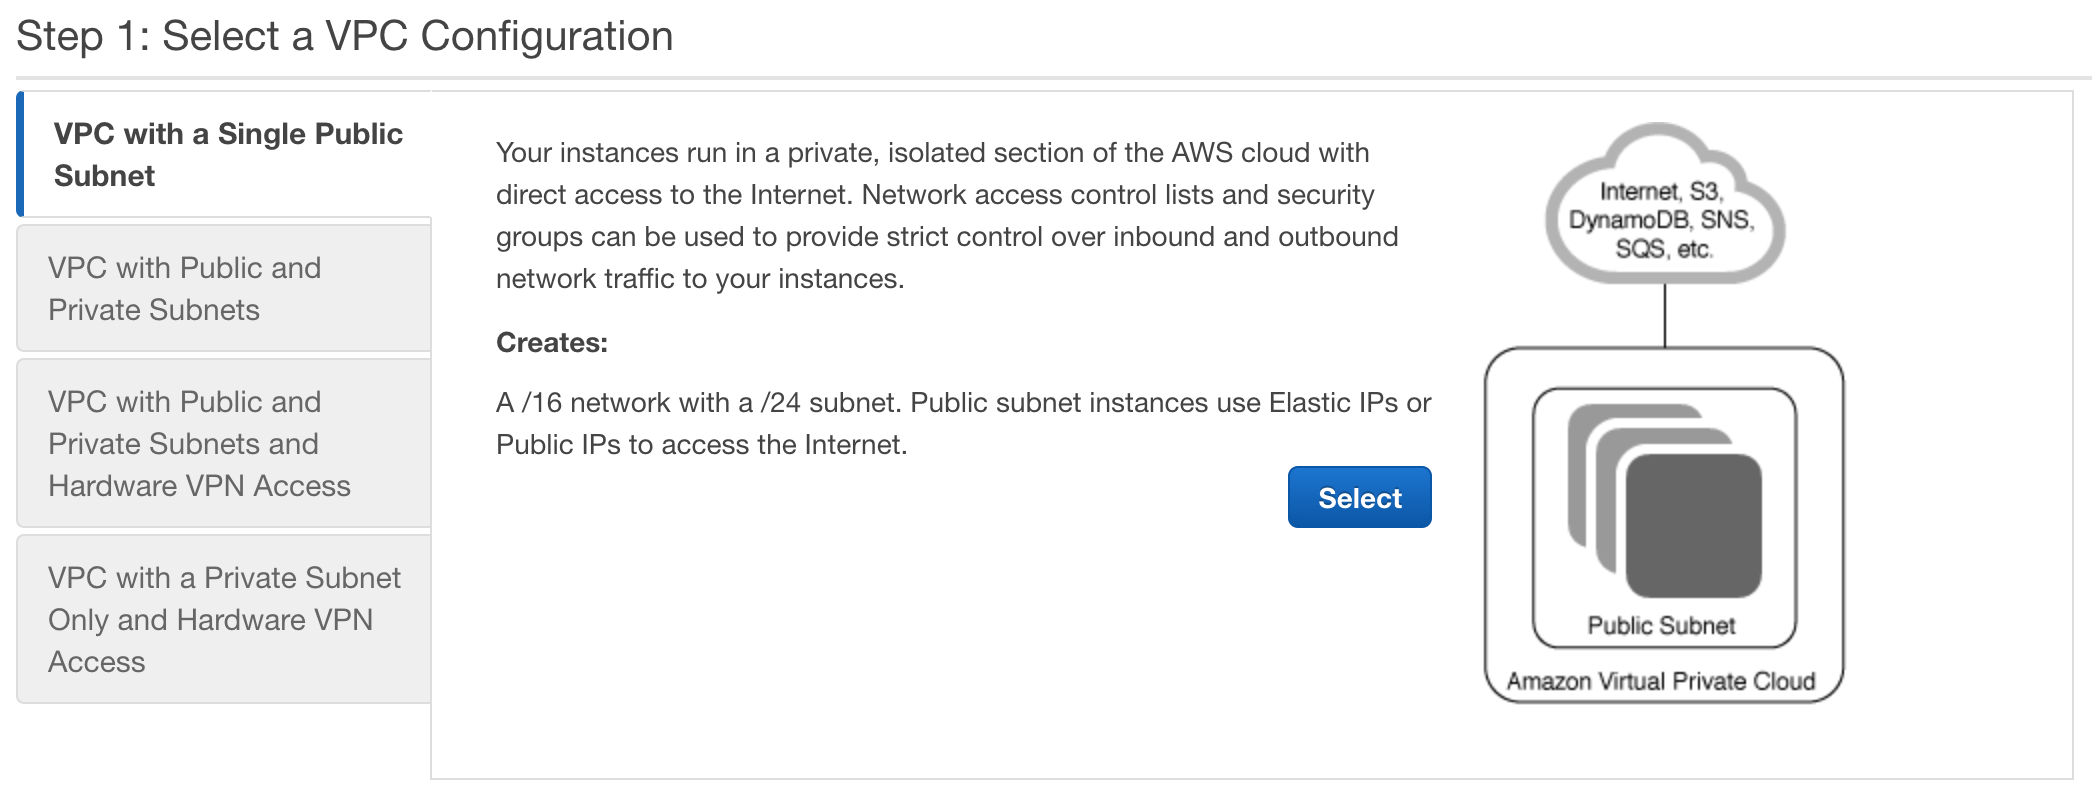
Single Public Subnet
Let’s click on Select for “VPC with Single Public Subnet”.
The wizard gives an run down of exactly what gets created as part of the wizard. Essentially this will create a VPC with 1 subnet inside it that is internet facing. All the relevant network access control lists and security groups will be created.
Ok now we understand what’s being created, lets go ahead and click the Select button.
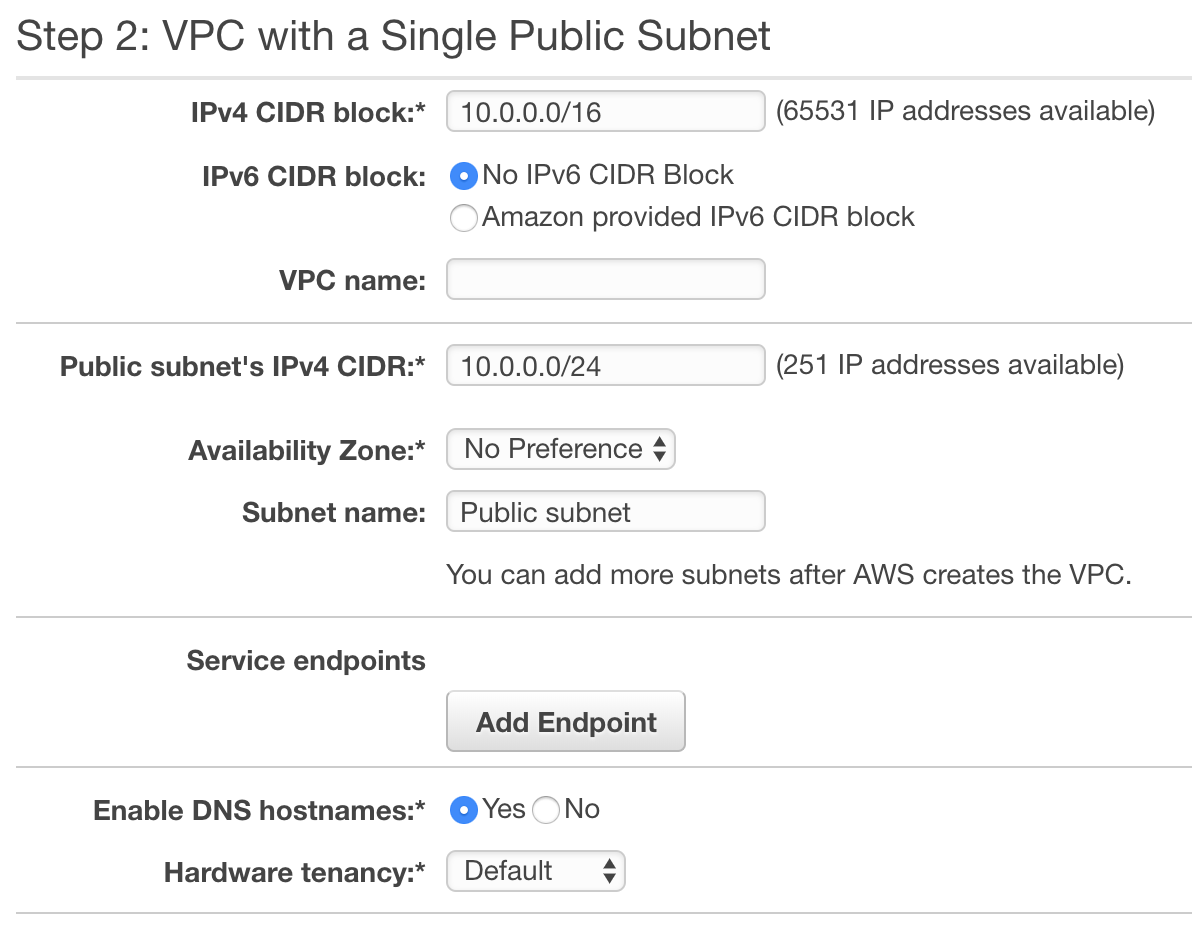
The next (and last) screen is basically the settings AWS has preselected for your VPC. It’s all fairly straightforward. If we break it down section by section you can see that the first block is dedicated towards the CIDR IP range available for the VPC.
The wizard has allocated 65531 IPs and chosen not to enable IPv6. Which in all honesty is the right choice for most common scenarios.
Then there is a blank field for the VPC name. You will have to fill this in obviously. As a side note, the subnets/nacls/security groups etc… will all be prepended with the name you give to your VPC. This is useful for tracking what belongs to what.
The next section is the public subnets configuration. You can see that they have chosen a smaller IP range for this subnet allowing for 251 IPs. After that you can select which availability zone the subnet is launched on (specifying which AZ is purely optional)
The service endpoints basically allows access for to other areas of AWS. You will not need to know about this for the exams.
Finally we have enable DNS hostnames, we want this so leave it as yes.
Then the last option is Hardware tenancy. Basically this means you can allocate dedicated hardware for your VPC. This can get expensive so let’s stick to the default shared setting.
Hit Create VPC and congratulations. You’ve just created a VPC in 4 minutes.
Note that is can take a while for some of the services associated with your VPC to startup. The NACL tends to be one of the slower. So don’t be alarmed if it ends up taking 5 mins to get started.
Public and Private Subnets
The process for setting up a public and private subnet is virtually identical to the public only VPC.
So we will focus on what steps differ from a single public subnet. The rest of the steps will be identical.
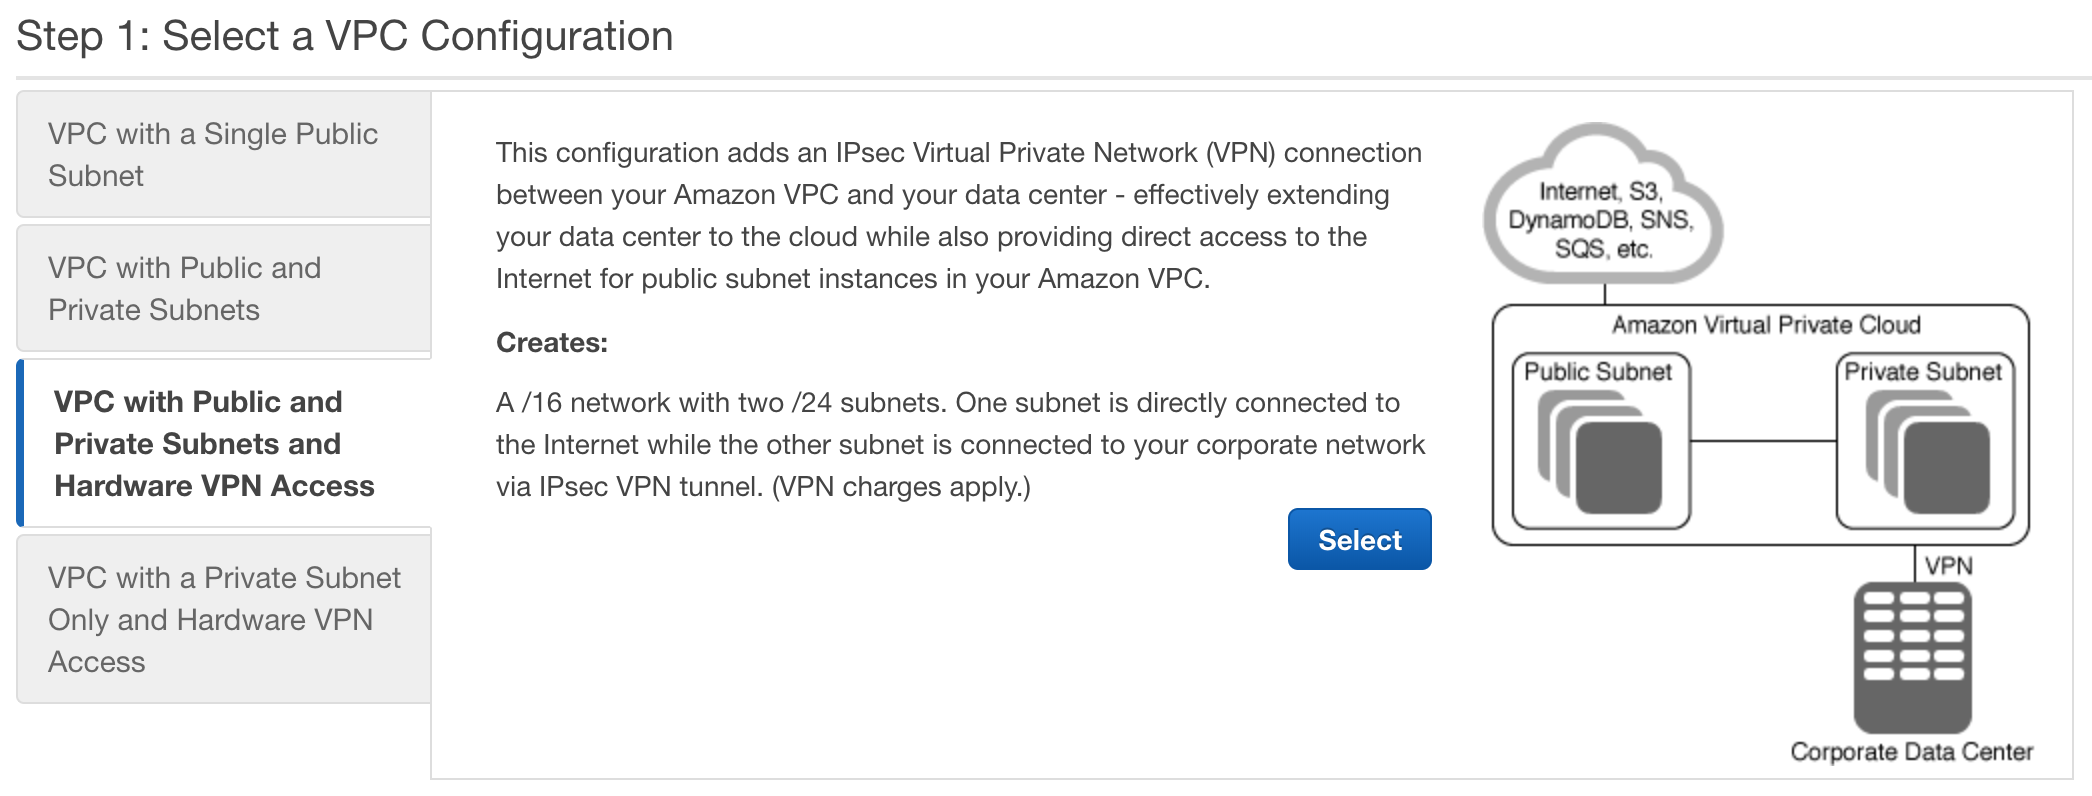
A VPC with Public and Private Subnets wizard adds a few extra elements to our VPC compared to the previous single public subnet example. In the example diagram below you can see that both a Private subnet is created and a NAT gateway. Note that the NAT gateway is contained in the Public subnet and provides a link to the Private subnet to allow EC2 instances within it to do things like get updates from the web.
The classic example of this is getting database updates. As databases are often put into private subnets for security reasons.
Let’s go ahead and click the Select button.
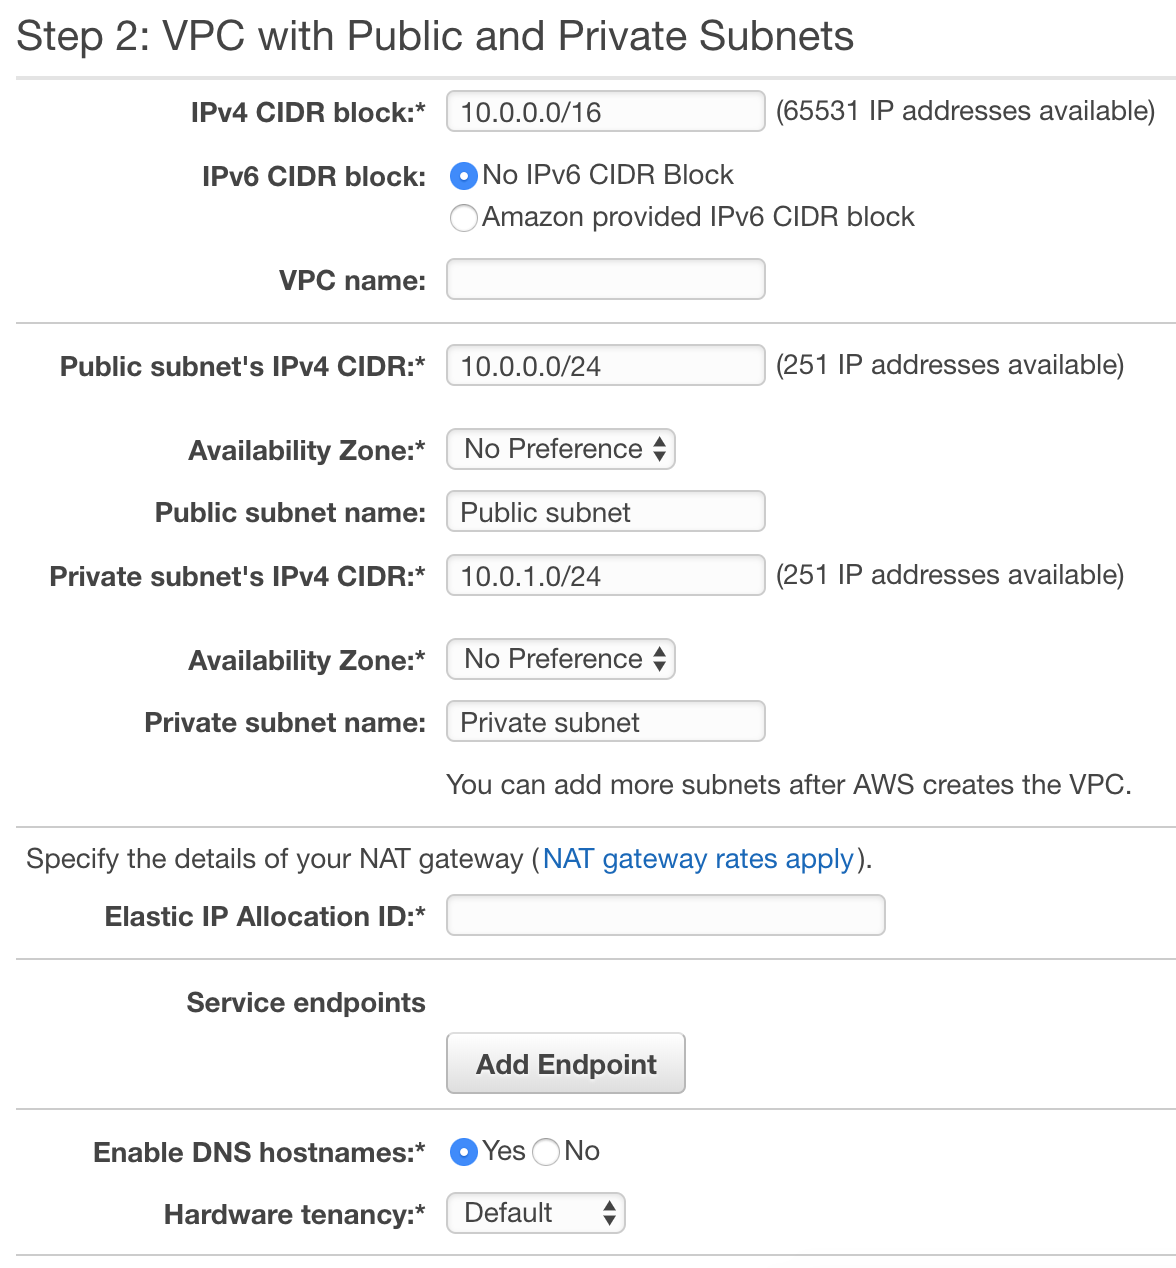
This screen should look pretty familiar to you already. It’s virtually identical to the one for a single public subnet, with 2 distinct differences:
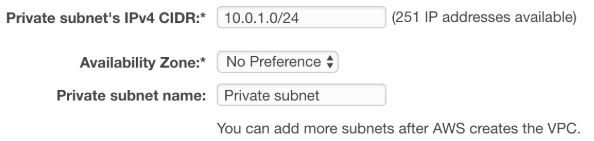
Private subnet settings:
This section is where we would define the the private subnet address range, set the availability zone and name the subnet.
Elastic IP Allocation ID:
When we connect to a NAT gateway we need an IP address that is static. Otherwise if the instance were to be restarted we’d need to find the new IP address. Clicking on the input box will present you with a list of available static IPs.
If you need to create an Elastic IP then head over to the EC2 dashboard. Create one, then this input will refresh and you can assign the static IP to your NAT gateway.

Ok, so that’s pretty much all the differences between the two wizard types.
Click create VPC and you’re done!
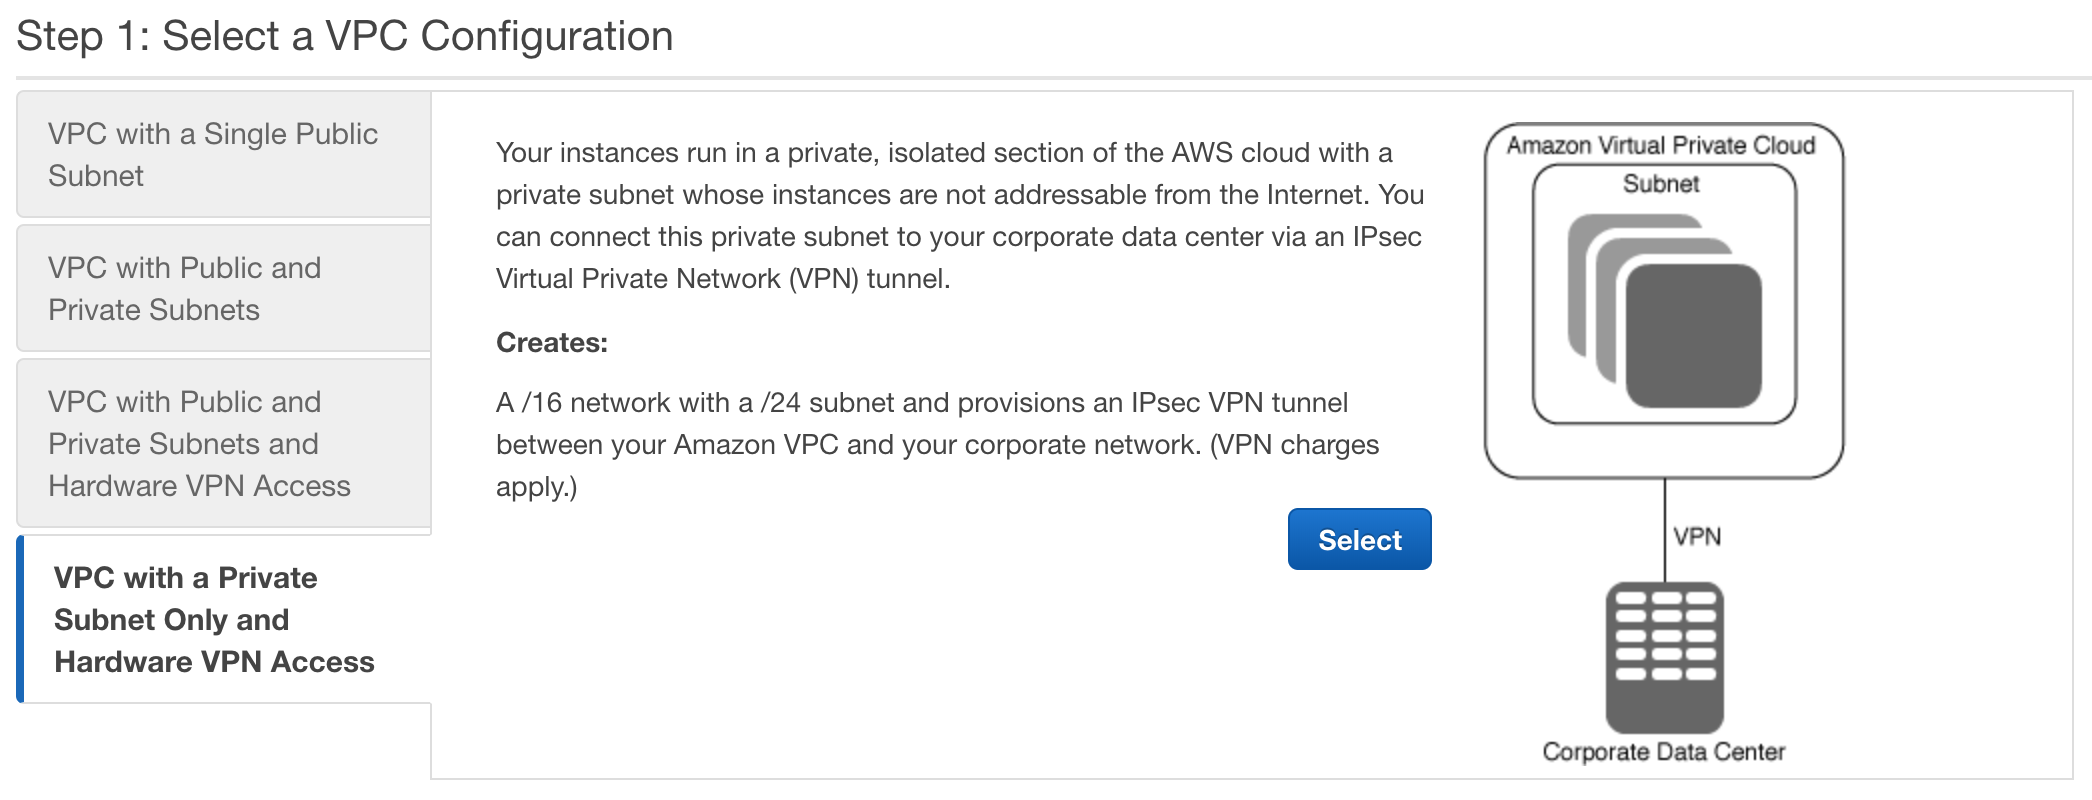
What about VPC with hardware VPC Access?
I’ll glance over these quickly as they are way outside the scope of the exam.
Both of these wizard options create VPCs just like the ones described above, however they include the addition of a hardware VPN Access this allows you to form a direct link between your own network and your VPC housed on AWS. Meaning you can extend your local network into the cloud.
Create a AWS VPC manually
While creating a VPC via the wizard is a convenient way to get up and running quickly. You don’t get to truly go into the level of details that is required for passing the AWS Architect associate exam. Going through the manual however, will let you really dig into the individual elements that make up a VPC.
So let’s go through those steps and examine what in more detail the components that make up a typical virtual private cloud setup.
Create the VPC
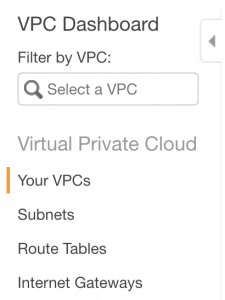
On the VPC dashboard select Your VPCs

Next we want to click Create VPC

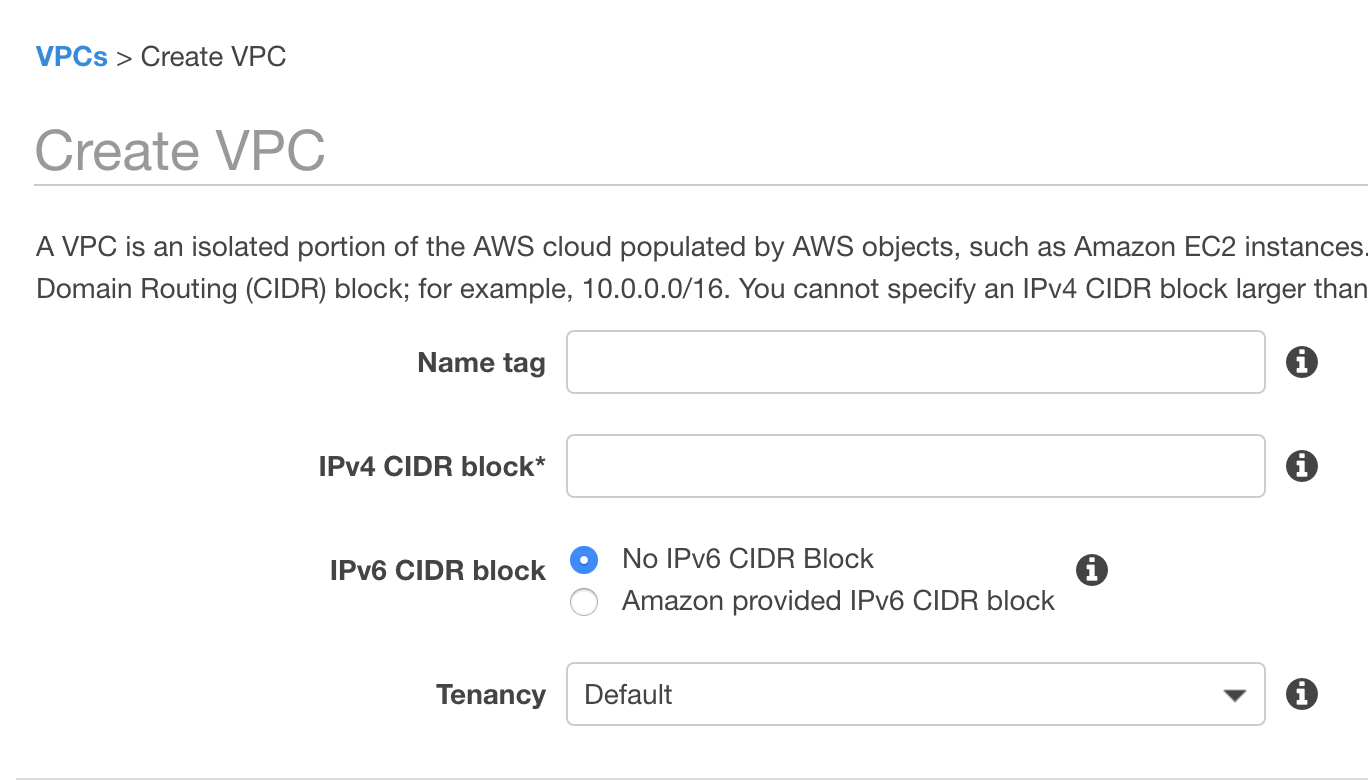
From here, we can give the VPC a name tag, a CIDR address range and select a tenancy type (i.e. dedicated or shared). Notice that the CIDR address range is left blank for you to fill in. Where as in the wizard workflow this would have been filled in.
Ok so lets give our VPC a name, address range and let’s move on. Hit Create.
AWS will create the following default components as part of your VPC:
- Router
- Route Table
- Network ACL
- Security Group
Note that you do not get a default Subnet
Our next step would be to create a subnet and associate it with our newly created VPC.
Subnets
To do this, select Subnets from the navigation panel:
Then we were presented with the subnet creation form:
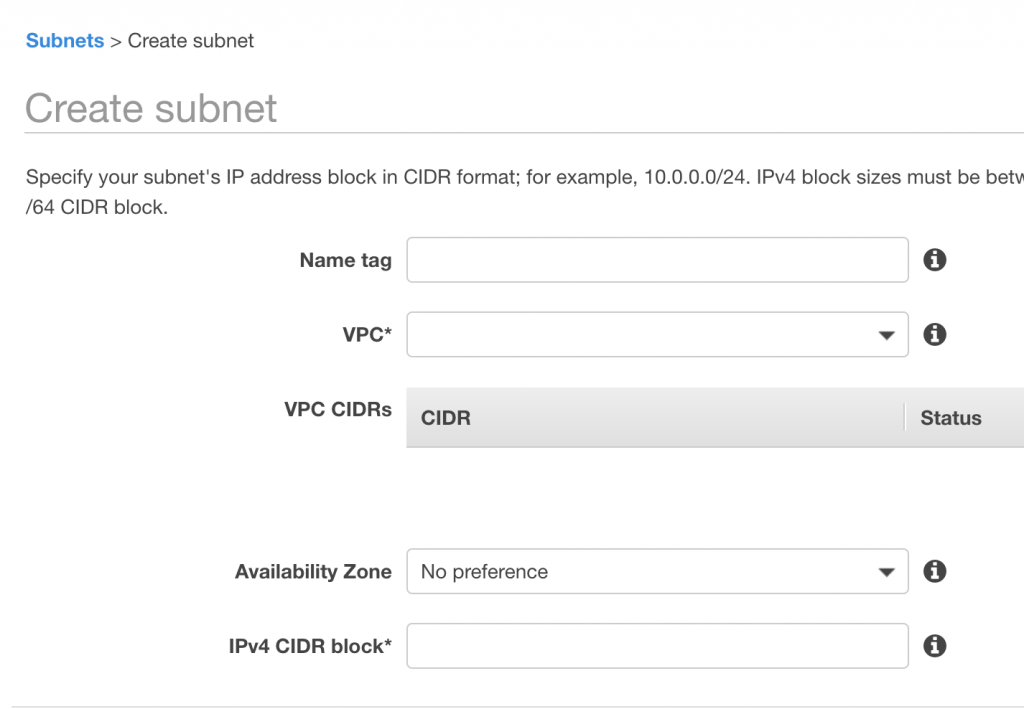
Give your subnet a name and select the newly created VPC from the VPC dropdown list.
You can chose an availability zone for your subnet to be allocated to. I suggest allocating a different availability zone for each subnet just to keep them seperate. But this is not required.
Next we allocate a CIDR address range for this subnet. I usually go with a /24 meaning you’ll get 251 (note not 256) IPs to make use of for this subnet.
Hit Create and you’ve got your first subnet done!
Internet Gateways
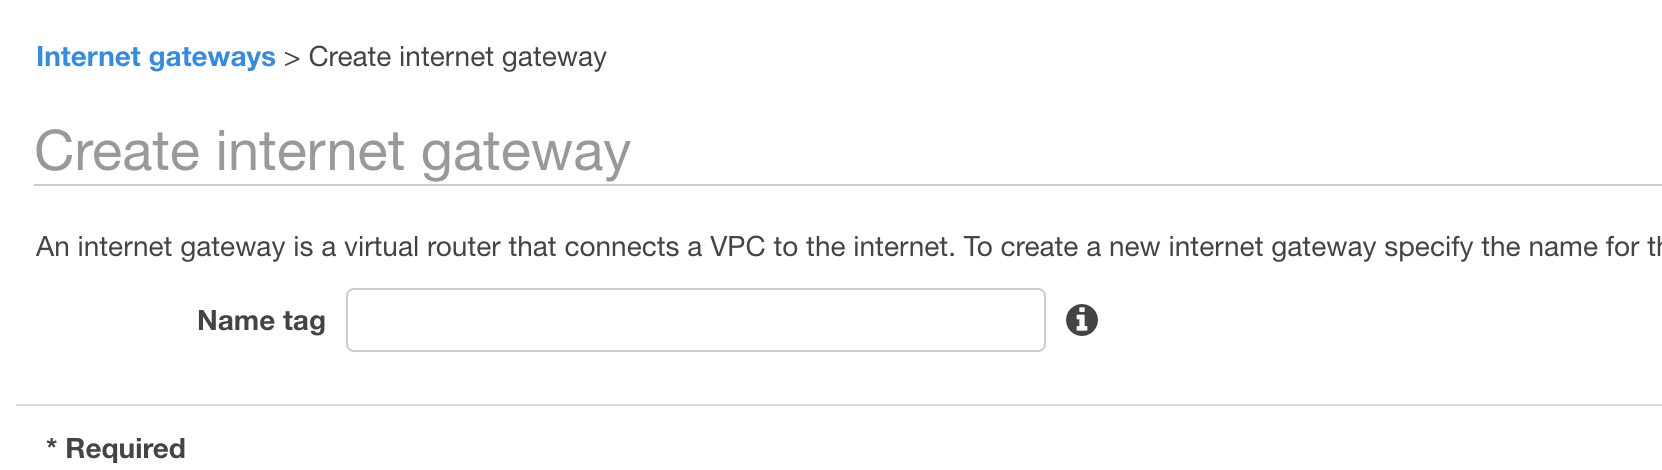
Now we want to allocate an internet gateway to the VPC so that we can access the VPC over the internet.
This is pretty straightforward. Simply click on the Internet Gateway link on the navigation panel just below subnets and enter a name for your IG.
By default the internet gateway is not associated with a VPC and is in a detached state.
Click on the actions list for our newly created internet gateway and select Attach to VPC.
At this point you are presented with a simple form that lets you select a VPC to attach this gateway to.
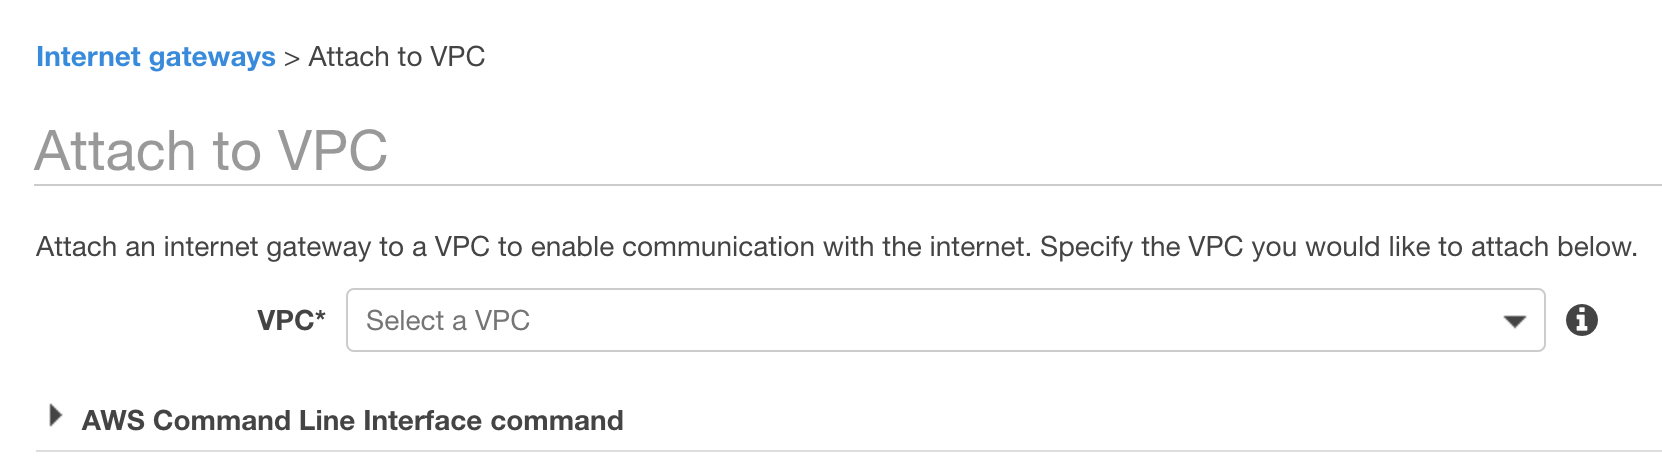
Exam Tip: note that you can’t associate multiple Internet gateways to the same VPC. So after we’ve assigned this gateway to our newly created VPC, if we were to repeat the process and create another IG then we wouldn’t see our VPC in the drop down list to attach it to. This is a common question that you may see in the exams.
Creating an EC2 instance in your subnet
Ok this is the last step in our tutorial on creating a VPC from scratch. There are of course other things we could of covered in greater detail such as creating an additional routing table section off a private subnet for instance. If you do want me to give an example of this let me know and I’ll update the tutorial to include it.
Onwards with creating an EC2 instance in our public subnet
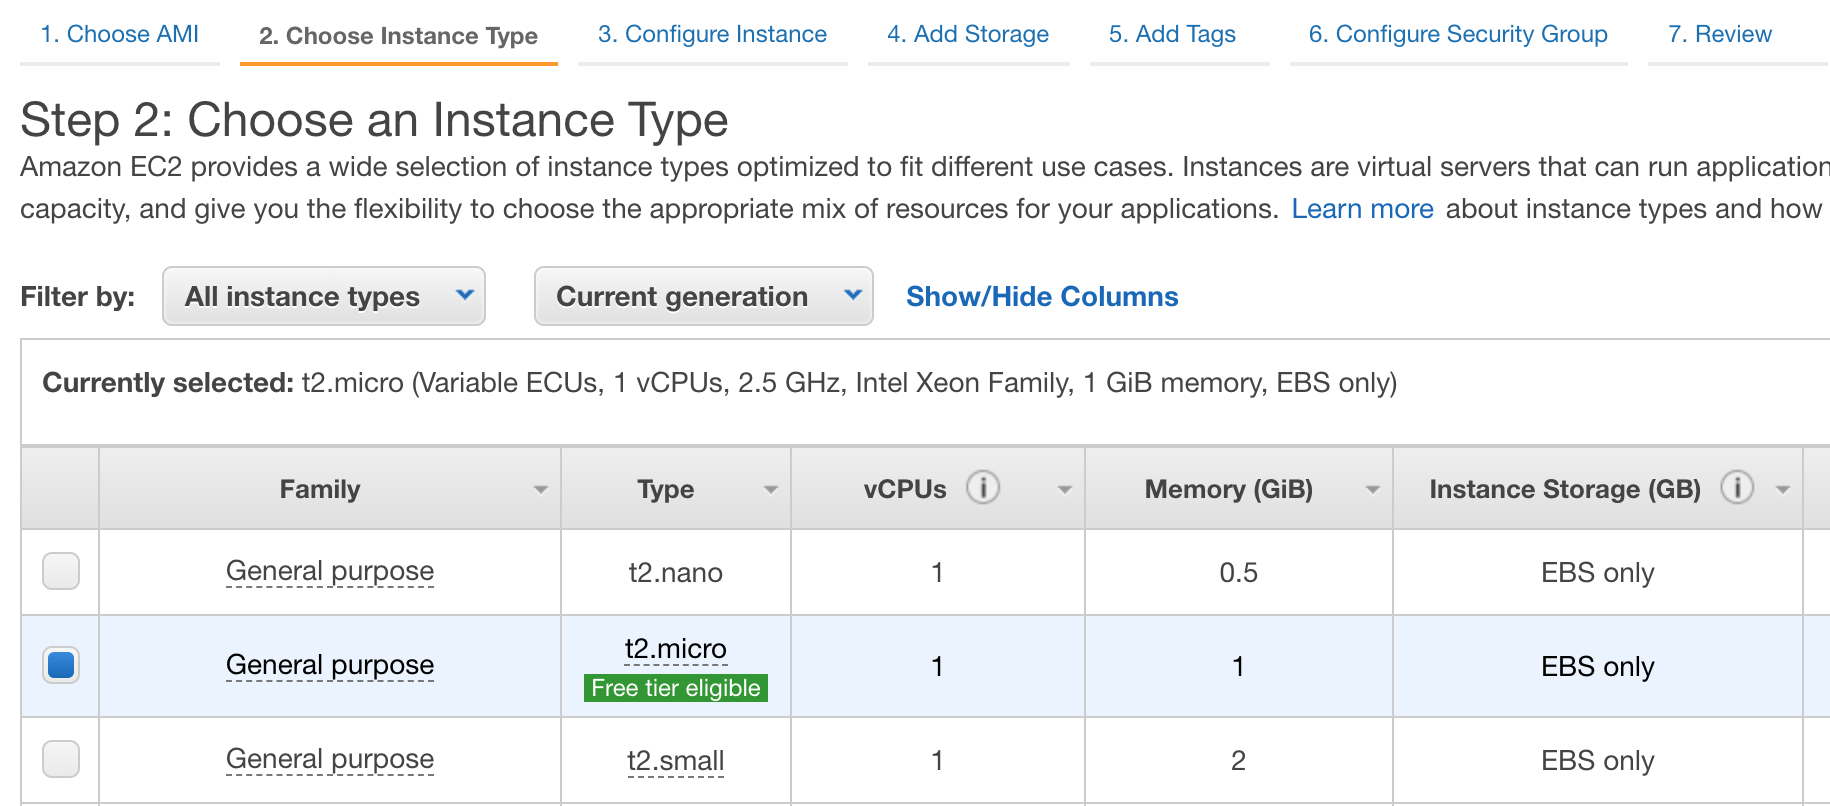
Select a t2.micro, we’ll be deleting all of the VPC contents after this tutorial so the size of the instance doesn’t matter.
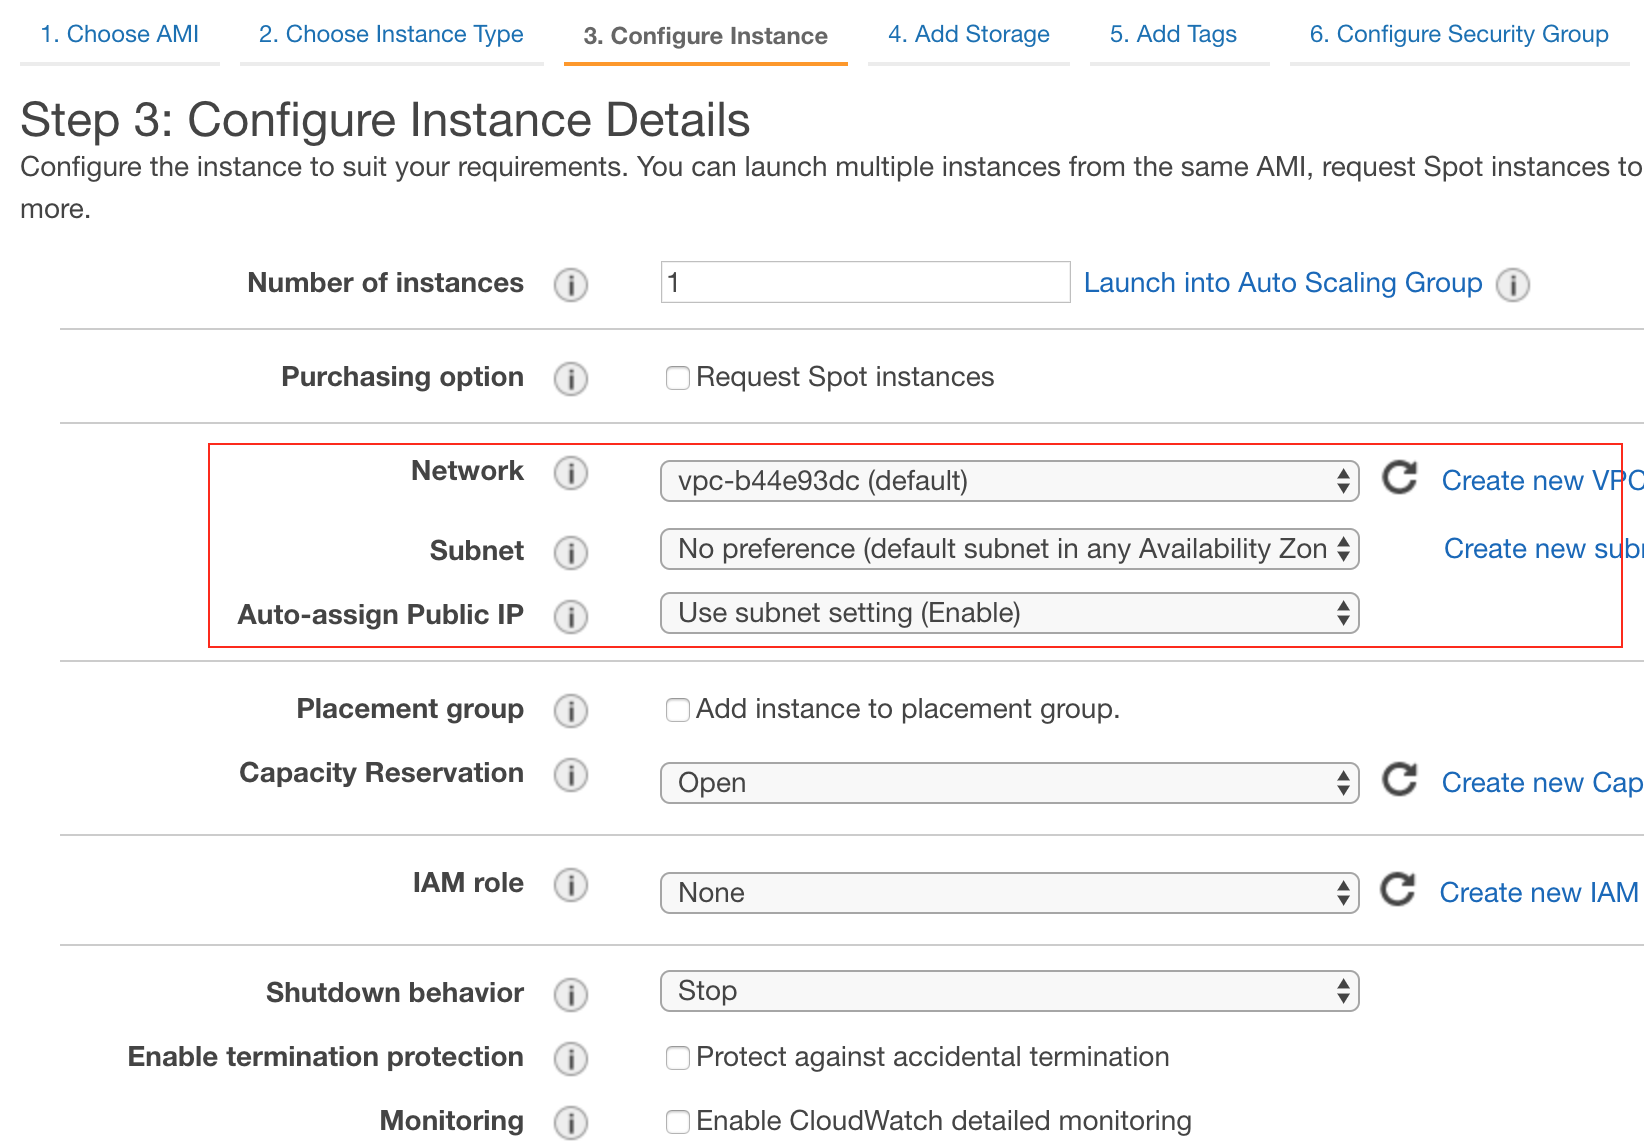
On step 3, pay particular attention to the section I’ve highlighted in red. This is where we assign what VPC this EC2 instance will be associated with.
Network refers to the VPC that instance will reside in.
Subnet refers to the subnet within the VPC that the EC2 instance will live in.
Finally Auto-assign Public IP will use the subnet settings by default. So in our case, it will assign a public IP address however if we had a private subnet then we may not want an publicly facing IP address for our instance. In this case no public IP address will be assigned.
Ok that’s it, you’ve successfully creating VPC manually. Having this knowledge is vitally important to passing the AWS associate exams.
Congratulations, you’ve taken a big leap forward to getting certified!
Deleting your VPC
Well there’s no point leaving a VPC hanging around racking up charges for you is there!
So we might as well go ahead and delete it and all its artifacts.
When you review what gets created as part of a VPC you can see there’s a bunch of cleanup to do. NAT gateways, security policies, multiple subnets, routers and router tables etc…. Fortunately though, you don’t have to delete them all individually.
Navigate to the VPC dashboard and right click on the VPC, select Delete.
At this point you’ll be asked if you want to delete all the artifacts associated with this VPC.
Select Yes and that’s it!
Summary
So we’ve created both wizard based and manual Virtual Private Clouds. Some of the theory we discussed in my previous post should hopefully start to making sense now.
In our next post, you’ll learn more about NAT gateways and NAT instances. Once you’ve mastered VPC’s you really are in with a good chance of passing the AWS certifications.
Stay tuned for the next post!
Comments
all things are explained very well
all things are explained very well
nice