

Welcome to part 2 of a multiple part course on passing your AWS Architect, Developer & Sysops Associate exams. The best part…this course is totally free of charge!
In this article we will look at Route53 DNS service. Route53 is AWS’s DNS management and routing policy service. You can do things like register domains here, set up health checks and configure how traffic to your websites is controlled.
It is guaranteed to appear in the associate exams.
The article will take just 10 minutes to read and I’ve included a few realistic exam questions around Route53 scenarios at the end of the article as a bonus.
Who should read this?
If you are studying for the:
- AWS Associate Architect
- AWS Associate Developer
- AWS Associate SysOps
Exams or you are using AWS and want to learn more about Route53 then this is the article for you.
N.b. To follow the examples in the article I recommend registering a domain, however it’s not required to learn the material. You could just read the article and know all that is required to pass the exam.
What you need to know
Ok, so I did a bunch of research to try and figure out exactly how much of Route53 appears on the associate exams. I checked out various online courses, mock exams (free & paid) and the AWS certification guide itself.
This is the conclusion I came to…
In order to cover Route53 for the exam you have to know the basics of each routing policy. That is pretty much it.
There’s a whole world of things to learn about DNS, but AWS doesn’t want to test you on that. It just wants to know what you know about Route53 specific services.
So that makes things a lot easier!
Let’s take a look at the routing policies…
The 6 Types of AWS Route53 Routing
- Simple Routing
- Weighted Routing
- Latency-based Routing
- Failover Routing
- Geolocation Routing
- Multivalue Answer Routing
Simple Routing Policy
Ok so this is the first of the 6 routing policies and is the most basic to understand (the clues in the name).
Here are the things you need to know:
A Simple Routing Policy consists of a single record in Route53 that has 1 or more IP addresses in it.
How to create a Simple Routing Policy
Step 1: Click on the Route53 icon located in the Networking and Content Delivery section
Step 2: Click on your Hosted domain that you have created. You are then presented with the DNS Record set page.
Step 3: Click on Create Record Set

Step 4: Creating the record set, ok so the thing to understand about this, is that there are generally 2 options. The first being pointing to a traditional IP address, just like you would in any other DNS service. While the second is AWS specific in that you point to an AWS resource.
So let’s take a look at each:
![]()
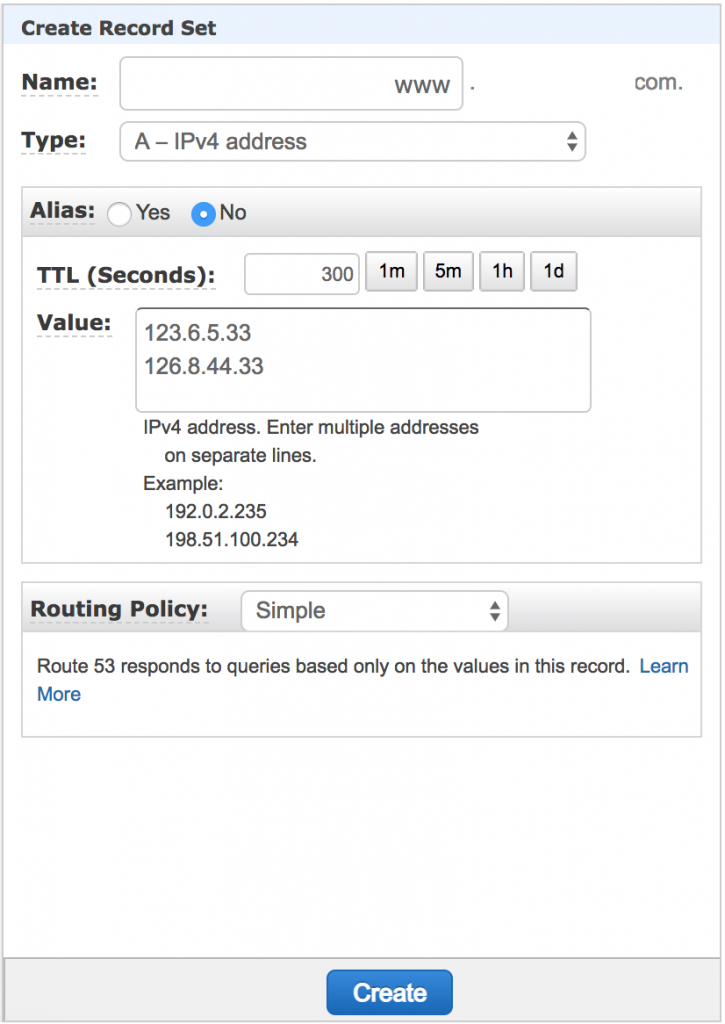
Ok what do you notice?
Third row down, there is the Alias option. You can see that switching between Yes & No changes the rest of the window.
Selecting Alias Yes:
In this case you have to enter an Alias Target value. This must point to an AWS resource. For instance an S3 bucket.
You get an extra feature though when selecting Alias, in that you can perform health checks on the AWS resource. Where as with Alias set to No, you can not. This makes sense because the IP address could be pointing anywhere.
Selecting Alias No:
In this case, the options start to look more like your standard DNS management. The first being the TTL (Time To Live) that is the time it takes the DNS values to be refreshed. Ideally (especially during development) you’d want to keep this value as low as possible.
The next option is Value (in my opinion this should say Values, since you can have multiple) is where you would add IP addresses. There must be at least 1 value.
What happens if I add multiple IP values?
In this case AWS will randomly switch between them. You will have no control over which one the user is directed to.
If you do want that control however, then in the next section I’ll show you how. With weighted routing policy.
Weighted Routing Policy
This isn’t that much more complicated than a simple weighting policy to be totally honest. The main differences are that using weighted routing you can define multiple records and then you can define exactly how much of your traffic is directed to each record via a percentage value.
Ok let’s see what this looks like and then run through the steps to set up a weighted routing policy.
How to create a Weighted Routing Policy
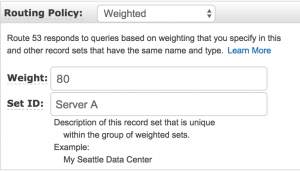
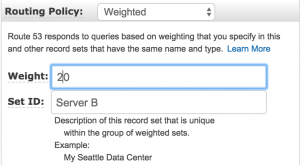
Let’s make up a scenario where you have a website (hamsterplanet.com) running on 2 servers. You want to direct the traffic 80% to server A (because it has a higher spec) and 20% to server B. How would we achieve this?
OK I’m not going to repeat the steps from Simple Routing Policy. Simply follow steps 1,2 & 3 to get to the DNS Record page.
Step 1: At this point we click Create Record Set.
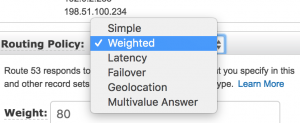
Step 2: Now the screen layout changes slightly.
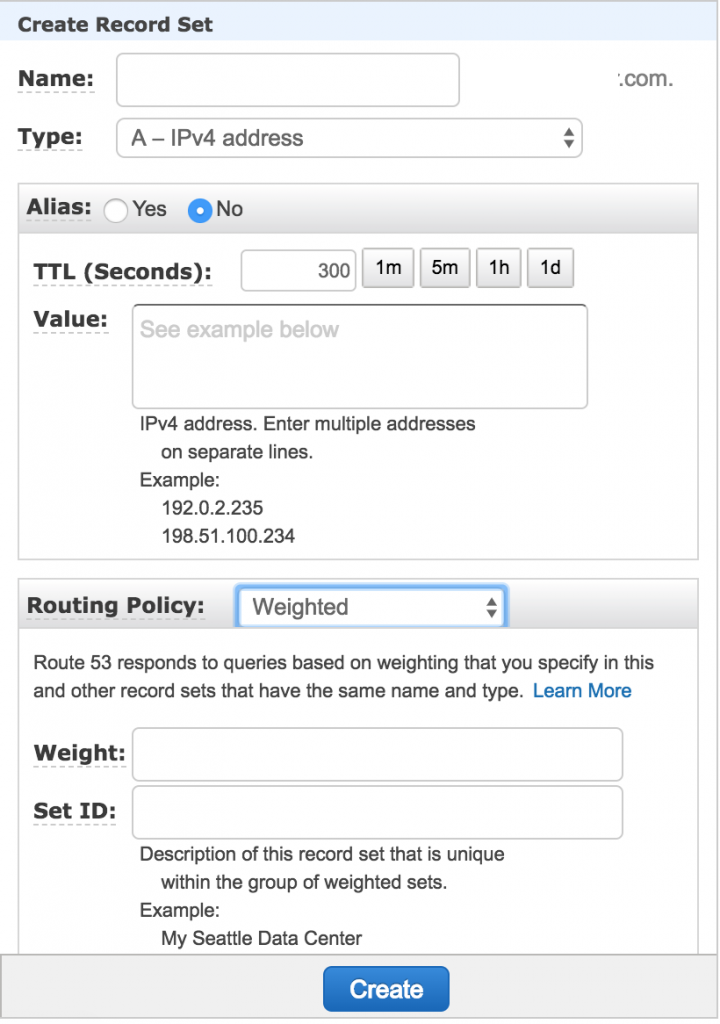
This time we still have the same value field for non Aliased addresses. However we now have a Weight: & Set ID fields on the lower half the window.
Step 3: Create 2 records of type Weighted. One pointing at the IP address of Server A and the other pointing at Server B.
Step 4: Click create on both of these record sets.
That’s it, you’re done. At this point (once the TTL has reset) AWS will start dividing traffic between Server A and Server B. The bulk of the traffic (80%) will go to Server A while server B will receive the remainder.
Latency Routing Policy
Like weighted, latency routing can have multiple record sets. The main difference comes in the way the traffic is divided up. Where weighted is based on a predefined values, latency is based on the users themselves and the response times between them and the servers within AWS regions.
Let’s say for instance that we have a user located in Australia and we have 2 servers hosting our website.
Server A is located in US-WEST-2 Virginia and Server B is located in EU-WEST-2 (London).
The response time for our Australian user is 400ms from the US-WEST-2 server and 150ms from the EU-WEST-2 server.
In this case, the Australian users traffic will be routed through to the EU-WEST-2 London server.
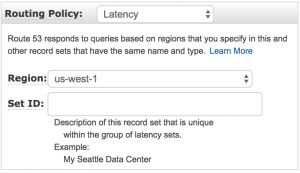
How to create a Latency Routing Policy
The process is virtually the same as with Weighted routing, however instead of specifying a weighted percentage value, you instead specify a AWS region.
Let’s take a look:
Here you can see the a drop down box where you can specify the AWS region and then give the record an ID.
While I’ve not included it in the screenshot, the IP/Alias section is much the same as before, where you would specify the IP addresses to forward.
It’s worth noting that even though it would make sense to list IP addresses that reside within your specified region, you are not forced to.
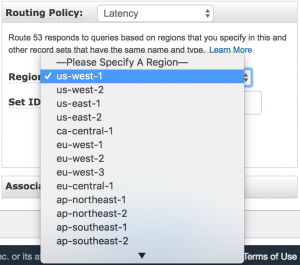
Here you see the drop down list of available AWS regions:
Failover Routing Policy
Ah right, this is where things start to get a little different. In the Failover Routing scenario we have a primary website and then we have a secondary backup website.
100% of traffic is routed to the primary website by default. The secondary backup website receives none.
However, if the primary site where to go down (detected via health checks) then all traffic is then routed to the secondary backup IP address.
How to create a Failover Routing Policy
Much the same as you would any of the other policies. Follow the steps to Create a Record set and then select Failover from the list. Then you’ll be presented with something like the following screenshot:
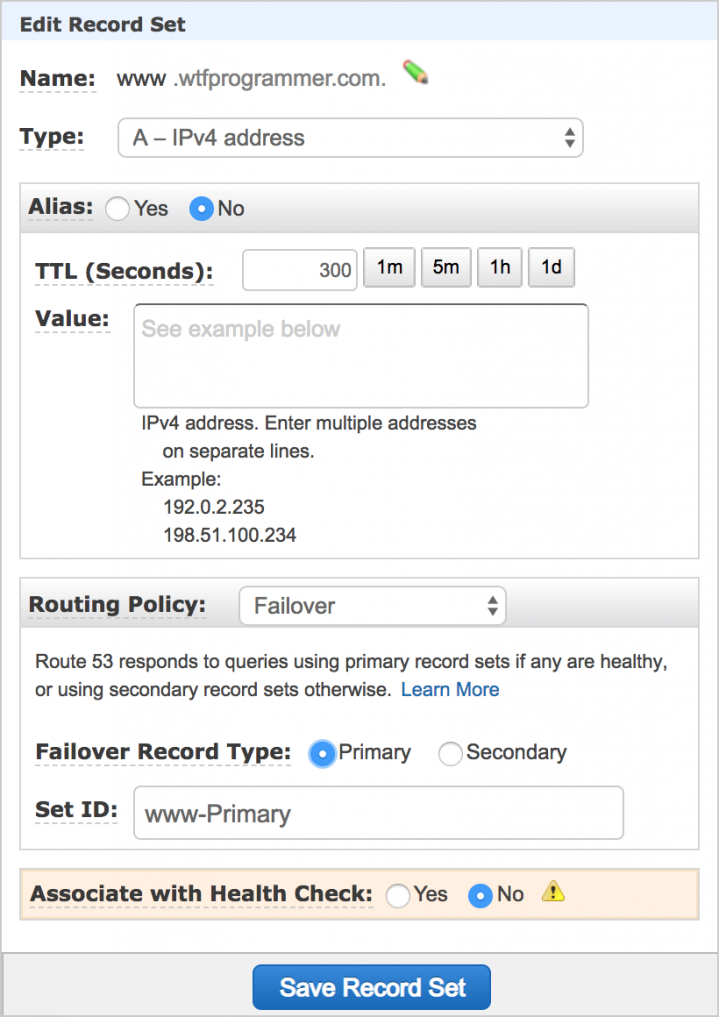
From here you can create either a primary or secondary record set. With an associated health check.
You’ll notice that there is a Warning flag on the health check. This is because Route53 needs to know when your primary site has gone down so it can route traffic to the secondary site.
Other than that, the process is very similar to Weighted and Latency routing.
I’ll show you in a later section how to create a health check.
Geolocation Routing Policy
Second to last!
Just Geolocation and Multi Value and you’re done. So what is Geolocation Routing Policy?
This one is pretty simple. It’s similar to Latency only with more control of the location that the user is making the DNS request from.
Essentially you get to specify where traffic from a particular country should be directed to. So for instance if you wanted all the traffic from France to be directed to a particular France specific site then you could do it here.
An example of this would be amazon.com & amazon.co.uk when a user makes a request to amazon.com and they are from the UK then you could use Geolocation to route that user to the amazon.co.uk site.
How to create a Geolocation Routing Policy
This should all be starting to feel familiar now. Create a record set and select routing policy Geolocation.

In route 53 you define the IP address and then the routing type to geolocation and finally the location where you want to direct the traffic from. I.e. from North America.
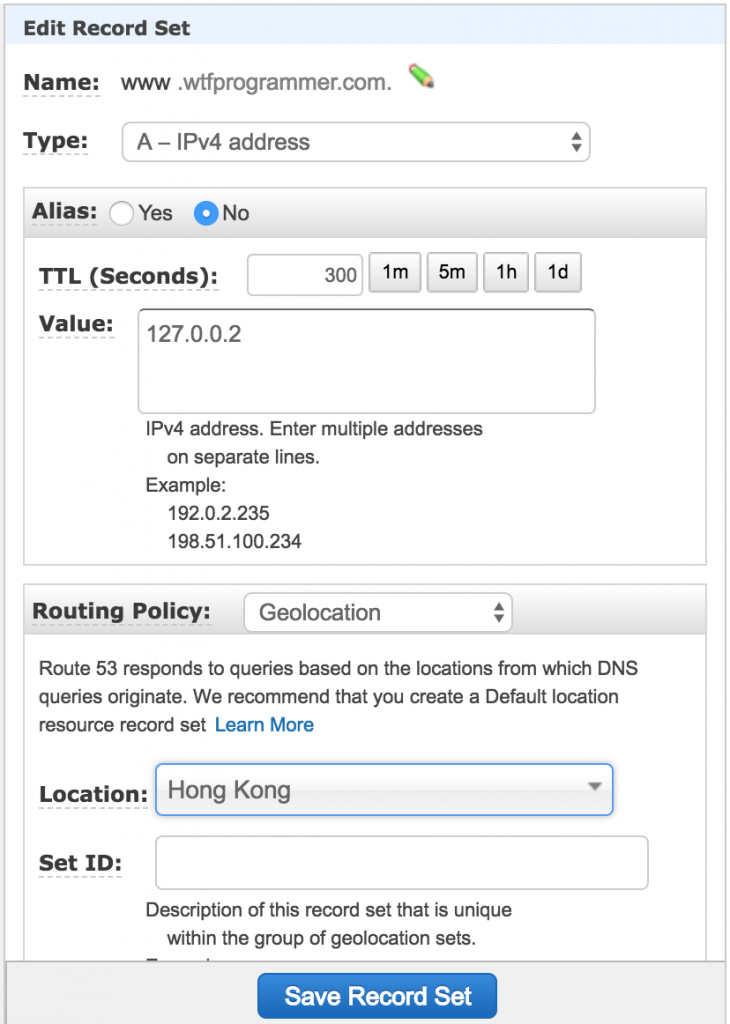
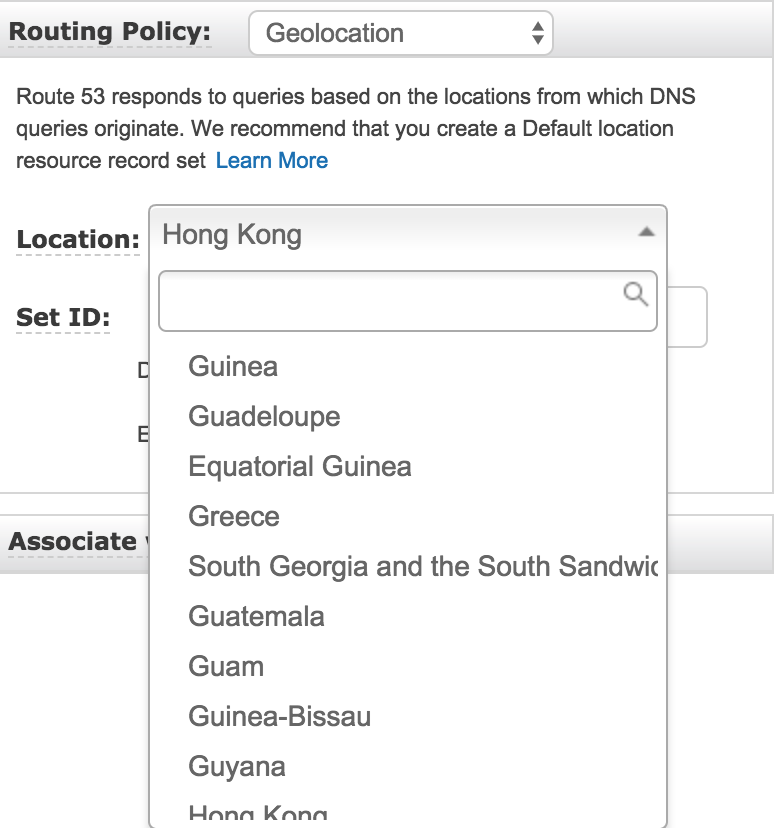
Save the record set and then that’s it you’ve successfully created a Geolocation policy.
It’s worth noting that you can create multiple record sets for as many location specific routing policies.
Multivalue Routing Policy
It’s basically the same as Simple Routing Policy however the main differences are that you can have multiple record sets and Route53 will pick one at random.
You can also assign health checks to each of those records.
One of the benefits of this over Simple Routing is that with each health check for a record set you can create a level of failover that simple routing can’t provide.
I won’t go into the specific details on how to create a Multi value routing policy as it’s identical to Simple routing with the exception that you can set an ID for the record to distinguish it from others.
Lastly you are limited to 8 Multivalue records. However I don’t think this will come up on the exam.
Creating a Health Check
Health checks have been mentioned a few times in this article, so I thought I’d put together a brief guide on how to configure an AWS route53 health check.
Firstly click on the health check link on the left hand navigation menu.
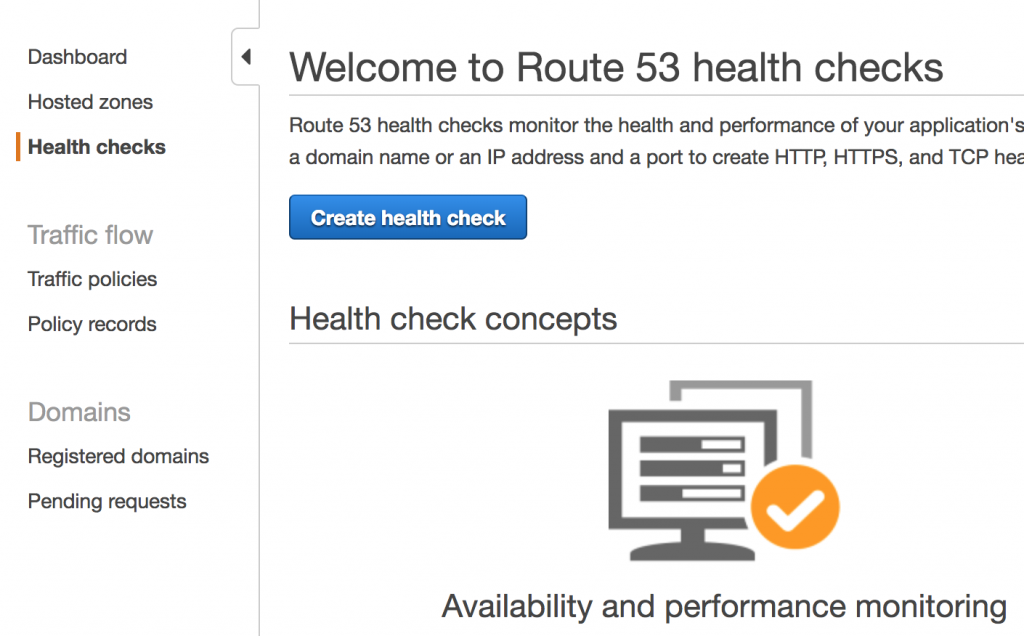
The Create health check.
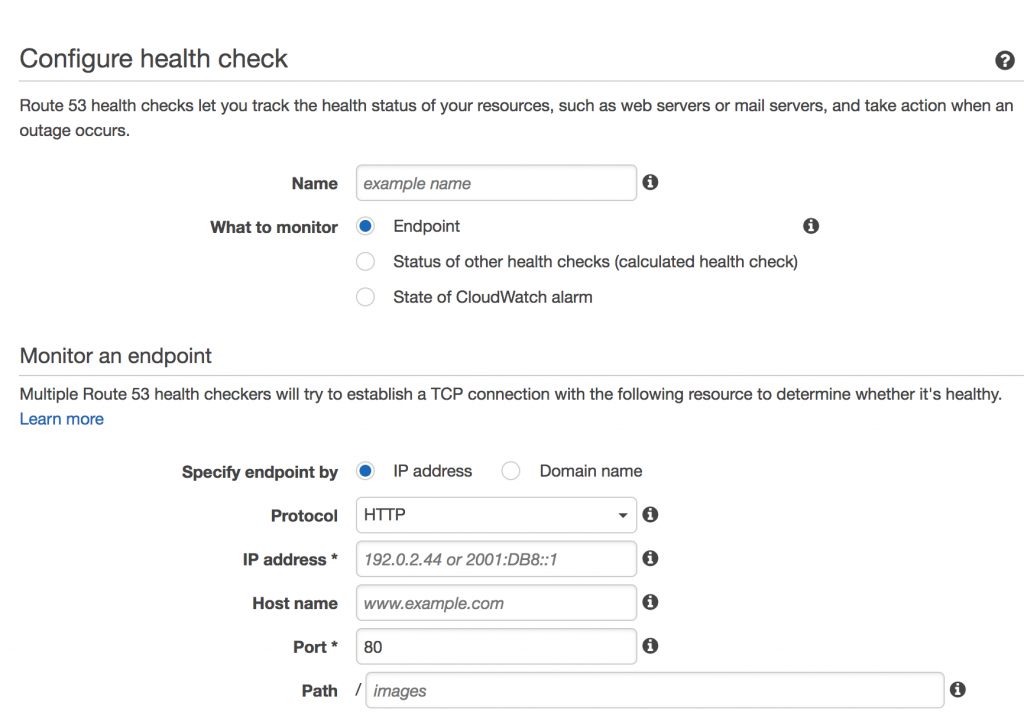
Here you can specify an IP based health check (the most likely option you’ll use) or domain check. In both cases these can then be linked to your record set.
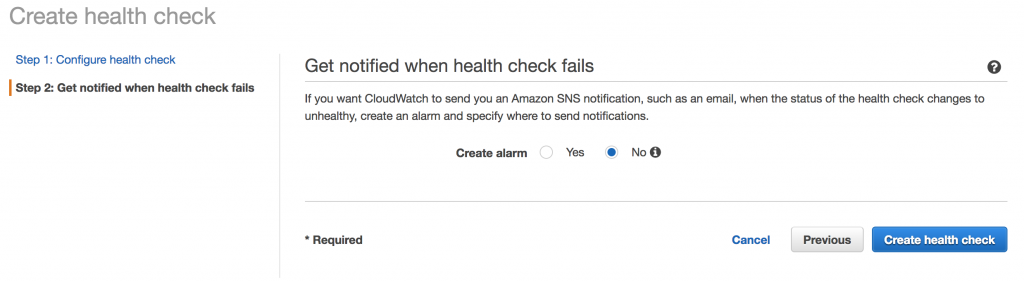
On the next page you can configure notifications for when a healthy check change to unhealthy. This makes because if your website did go down then how would you know unless you were notified.
If the system is automated you may want to skip this step.
Ok now we can see the health check in our dashboard.
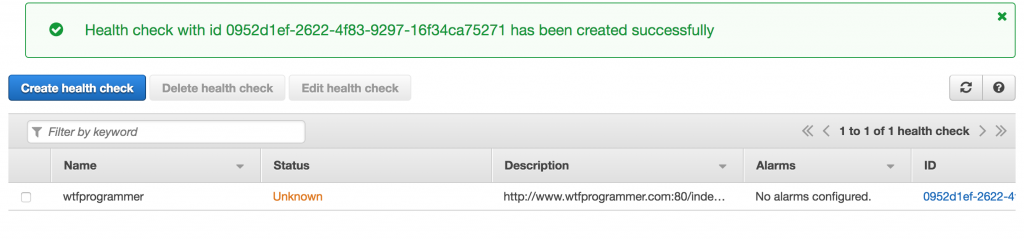
You’ll notice that the status is Unknown. This will update shortly when the healthy check initializes.
Here’s an example of a failed health check:
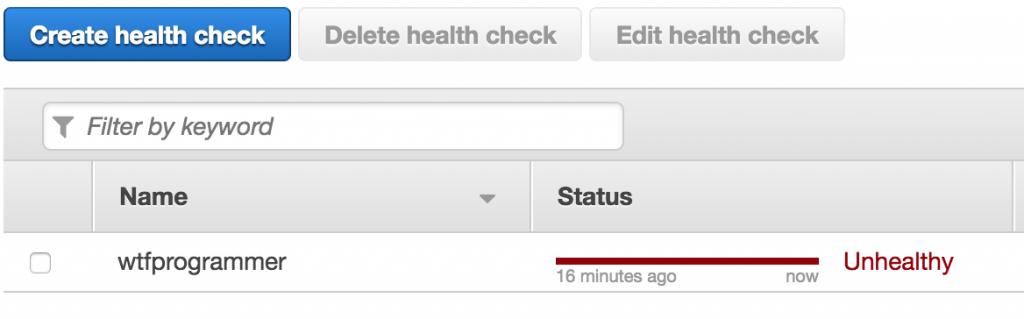
If you had configured notifications then you would have been notified by now of this healthy check failure. And finally if you had a routing policy like some of the examples above. Then the failure may trigger a switch in the routing.
For instance if you had a failover routing policy setup, then it is likely that the traffic would be redirected to the secondary site.
Exam Tips
You are unlikely to be quizzed on what an A record or a C record is, that’s not what amazon are focusing on. You are more likely to be asked about routing policies.
Certification Exam Questions
What is a CNAME record?
Maps to another domain name rather than a specific IP address.
There is a limit to the number of domain names that you can manage using route 53?
Yes, it’s limited to 50 domains per account. However you can request to have that limit raised.
Route53 is named so because?
Well the ‘Route’ part comes from the famous Route 66 and the ‘53’ part comes from the port 53 that is opened for DNS (Also known as TCP or UDP)
Does route 53 support mx records?
Yes, Route53 supports MX records.
Route 53 can be used to route users to infrastructure outside of aws true or false?
True, it’s a DNS system and can point to IP addresses outside of AWS’s platform.
What’s next?
Check out my article on Identity Access Management (IAM) and learn all you need to about AWS user management for the Associate exams.